Creating Access Rules
<!-- AUTOMATION_METADATA_START
screenshot_source_url: https://
This guide shows you how to create access rules, called policies, that decide who can connect to which servers and when.
<!-- Automation screenshot source URL: https://
What Is a Policy?
A policy is a simple rule that answers one question: should this person be allowed to connect right now?
Policies help you:
- Remove access quickly when someone leaves, without touching every server.
- Apply stricter rules to sensitive servers.
- Keep a clear record of who can access what.
Before You Create Policies
Make sure you have:
- At least one server already joined to your team.
- A plan for tags, such as
prod,db, orbastion. - Permission to manage policies (the Manage Policies or Admin role).
- A test user and server to try allowed and denied connections.
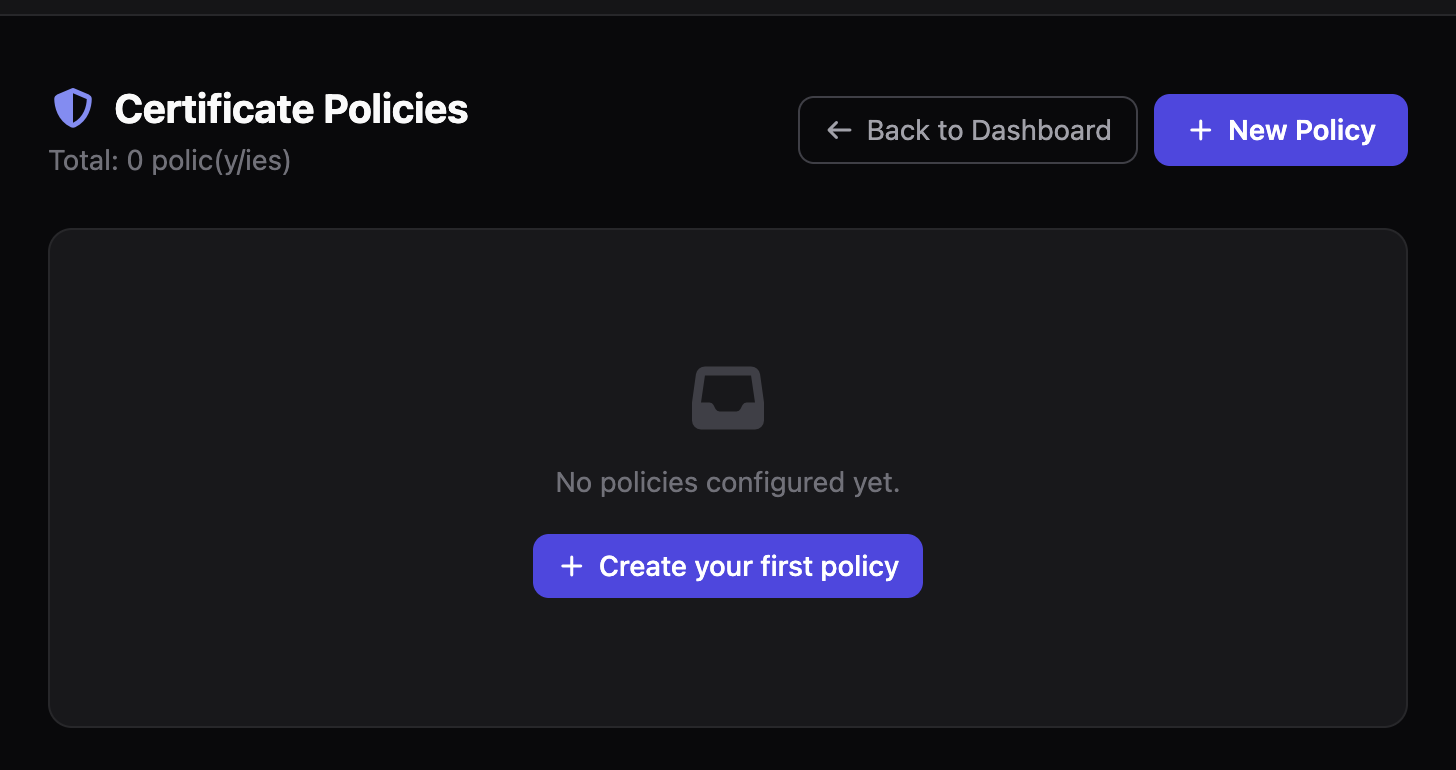
Create Your First Policy
Here is a quick way to set up a basic rule:
- Open
https://<hostname>/policies. - Click New Policy.
- Give it a name, for example
prod-team-access. - Set Enabled to true.
- Set Priority to
100. - Under Tags, enter
prod. - Under Principals, enter the Unix accounts users may connect as, for example
ubuntu,deploy. - Optionally set allowed days and times.
- Click Save.
Then test it:
- Try a connection that should be allowed.
- Try one that should be denied.
For sensitive servers, create a second, stricter policy:
- Click New Policy.
- Name it something like
bastion-admin-only. - Pick specific servers and specific admin users.
- Add a source IP constraint if you want to limit access to your office network.
- Give it a lower priority number than your broad policy, for example
50. - Save and test again.
Lower priority numbers take precedence, so stricter rules win over broad ones.
What Each Policy Field Means
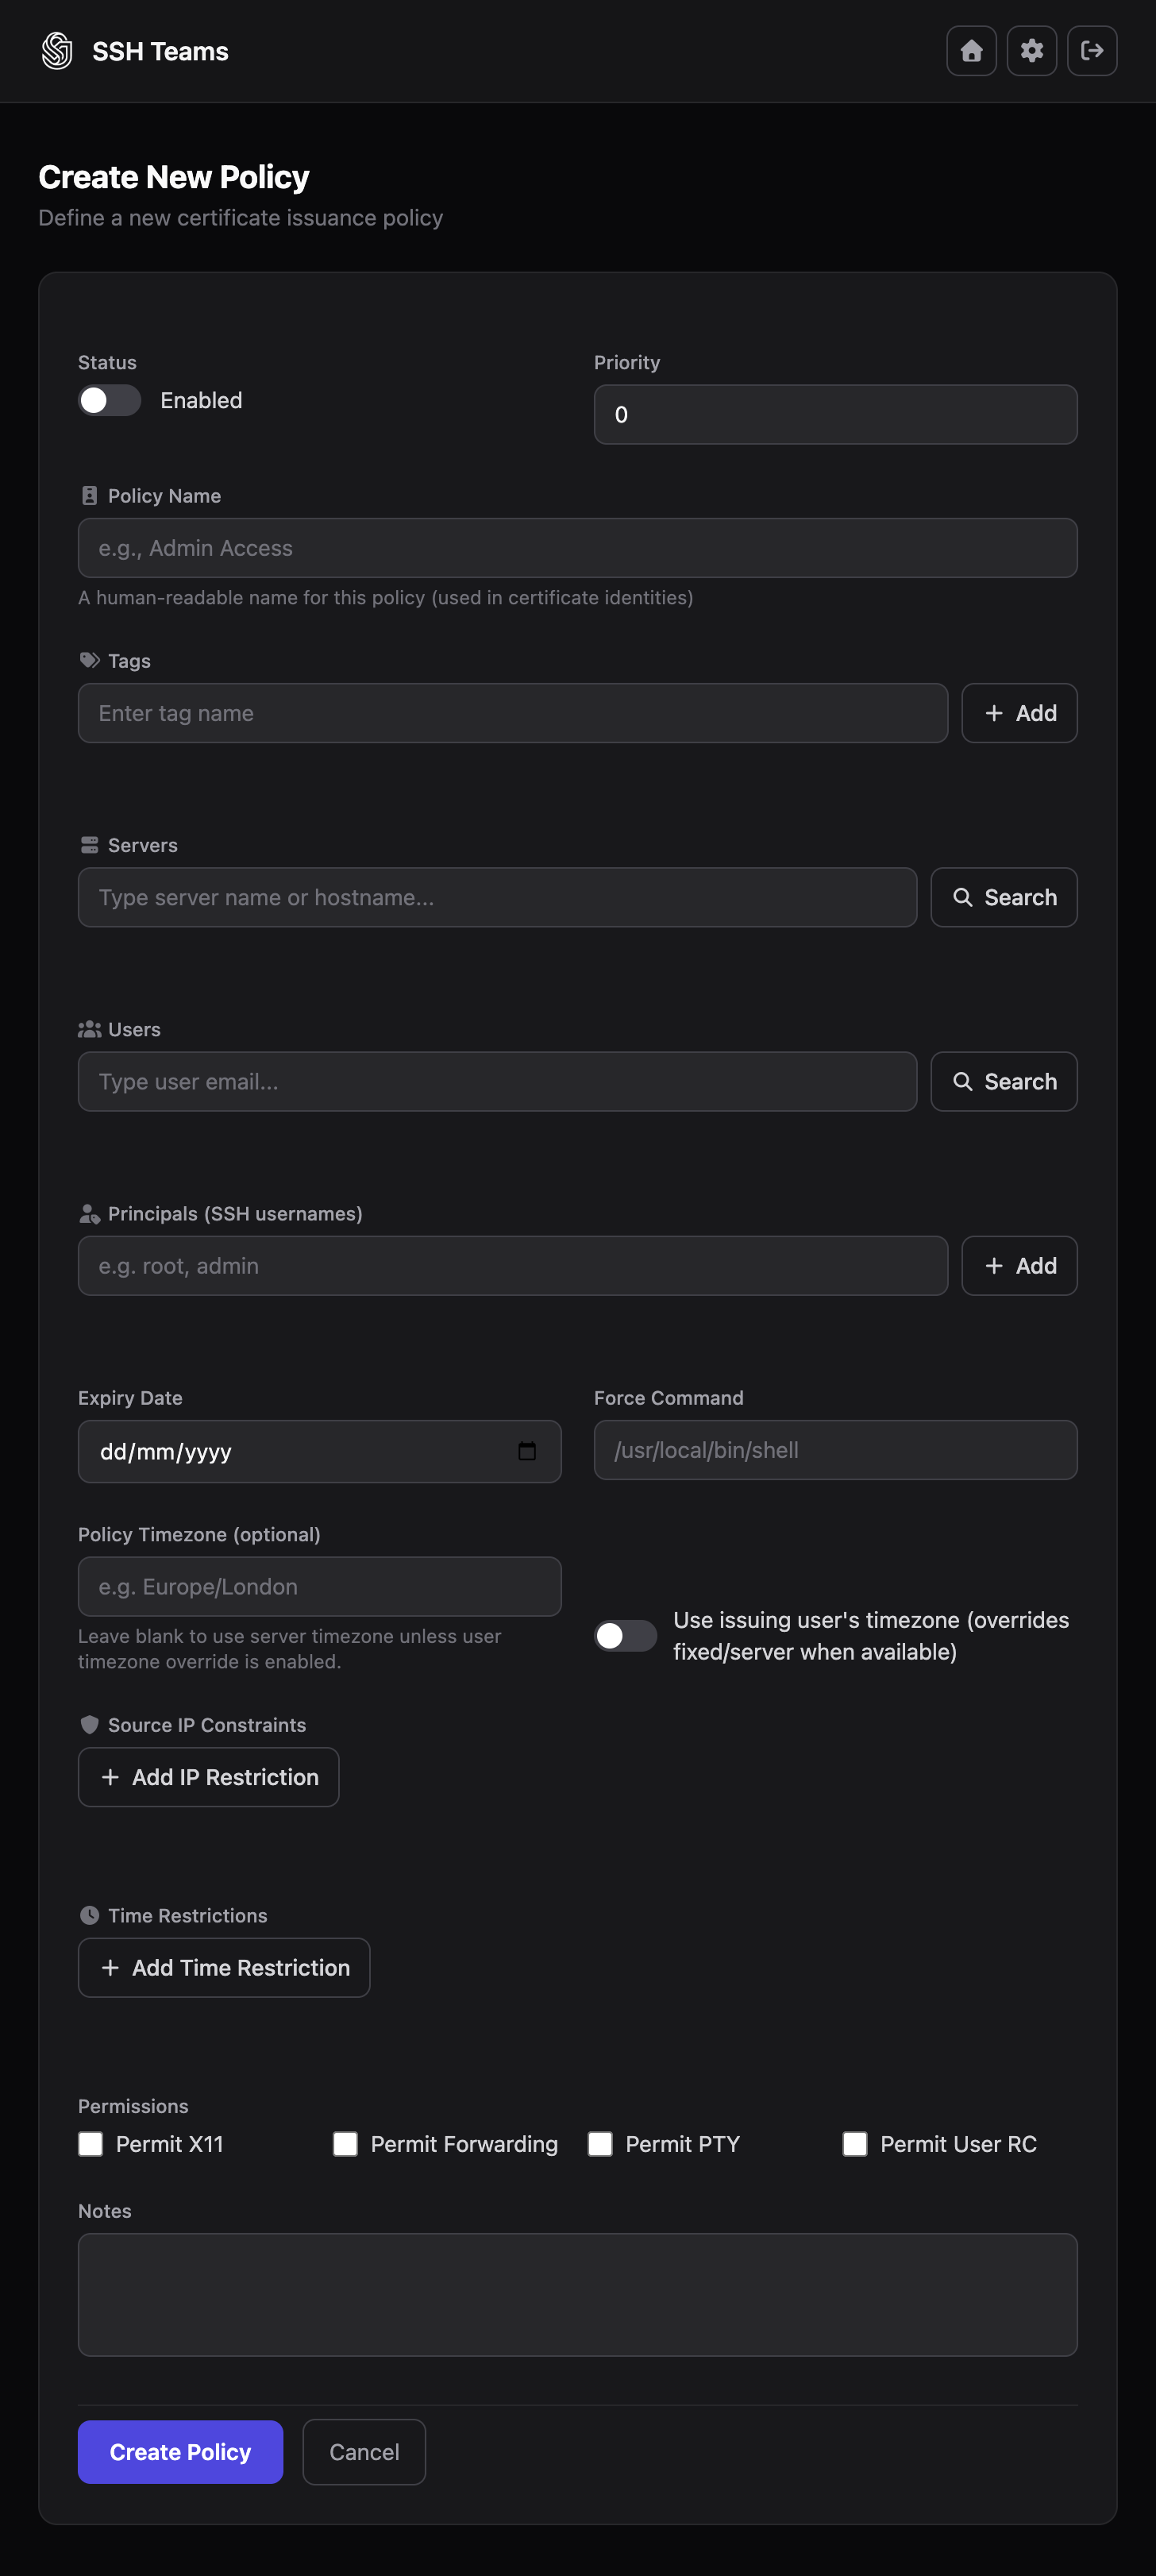
- Tags: Applies the rule to all servers with matching tags. Good for groups of similar servers.
- Servers: Applies the rule to specific servers only. Good for critical machines.
- Users: Limits the rule to specific people. Useful for admin or break-glass access.
- Principals: The Unix account names the user is allowed to connect as, such as
ubuntuordeploy.
Keep Tags Consistent
Use the same tags everywhere, like prod, db, and bastion. This makes your policies easier to read and maintain.
Time and Time Zone Settings
You can limit when a policy is active:
- Policy Timezone: The fixed time zone used to evaluate the rule.
- Use the user's timezone: Use this if your team works across regions.
- Time Restrictions: Days and hours when access is allowed, such as Monday to Friday, 9:00 to 17:00.
Supported day values include MON through SUN, WEEKDAYS, WEEKEND, and ALL_WEEK.
Extra Restrictions You Can Add
- Expiry Date: The last day the policy is valid.
- Source IP Constraints: Only allow connections from specific networks.
- Force Command: Run a fixed command automatically when the user connects.
-
Permit Flags: Turn on or off features like X11 forwarding, port forwarding, or interactive sessions.
- Permit PTY — gives the user an interactive shell prompt. This is what most people expect when they run
sshteam ssh, so it should usually be turned on. - Permit Forwarding — allows the user to create tunnels for ports or the SSH agent through the connection. Enable this only if your team relies on forwarding.
- Permit X11 — lets graphical programs run on the server and appear on the user's desktop. Enable this only if you use X11 forwarding.
- Permit User RC — runs commands from the user's
~/.ssh/rcfile on the server. Most teams leave this off unless they have a specific need.
For standard shell access, enable Permit PTY and leave the other options disabled unless your workflow requires them.
- Permit PTY — gives the user an interactive shell prompt. This is what most people expect when they run
For production, keep these flags minimal. Only enable what your users actually need.
Common Policy Patterns
| What you want | How to set it up |
|---|---|
| General team access | Tag: prod, Principals: ubuntu,deploy, business hours |
| Admin access to a gateway | Specific servers, specific users, office IP range |
| Emergency break-glass | Highest priority, small user list, short expiry |
| Automated service access | Service account, fixed principals, restricted IP range |
Create, Update, and Delete Policies
To create a policy:
- Open
https://<hostname>/policies. - Click New Policy.
- Fill in the fields.
- Click Create Policy.
To update a policy:
- Find the policy in the list.
- Click Edit.
- Make your changes.
- Click Update Policy.
To delete a policy:
- Find the policy in the list.
- Click Delete.
- Confirm the prompt.
After saving, check that the policy shows the expected priority and status.
Avoiding Edit Conflicts
If two admins edit the same policy at the same time, the first save wins. The second person will see a conflict message and will need to refresh and try again.
To avoid this:
- Keep policy edits small.
- Refresh the page before making big changes.
- Use the notes field to record why a policy exists and when it should be reviewed.
Fixing Common Policy Problems
-
You cannot create or edit policies.
- Make sure your account has the Manage Policies or Admin role.
-
The policy form shows an error.
- Check that the timezone is valid.
- Check that the expiry date is in
yyyy-MM-ddformat. - Check that time restrictions match the
DAY,HH:mm,HH:mmformat.
-
Access is denied when it should be allowed.
- Check that the server tags and server selection match.
- Check that the user and principals are included.
- Check that the current time, date, and source IP satisfy the restrictions.
-
Changes seem to disappear.
- Someone else may have saved the policy first. Refresh and reapply your change.
Tips
Start Simple
Begin with two policies: one broad rule and one strict rule. Add more only after you have tested real connections.
Remember Principals
A common mistake is matching the server and user correctly but forgetting to include the Unix account name in Principals. Without it, access will still be denied.