Administration and Operations
This chapter is your day-to-day operations guide for SSH Teams. It covers how to keep the service healthy, manage certificates and licenses, and make sure notifications keep working.
Administration Overview
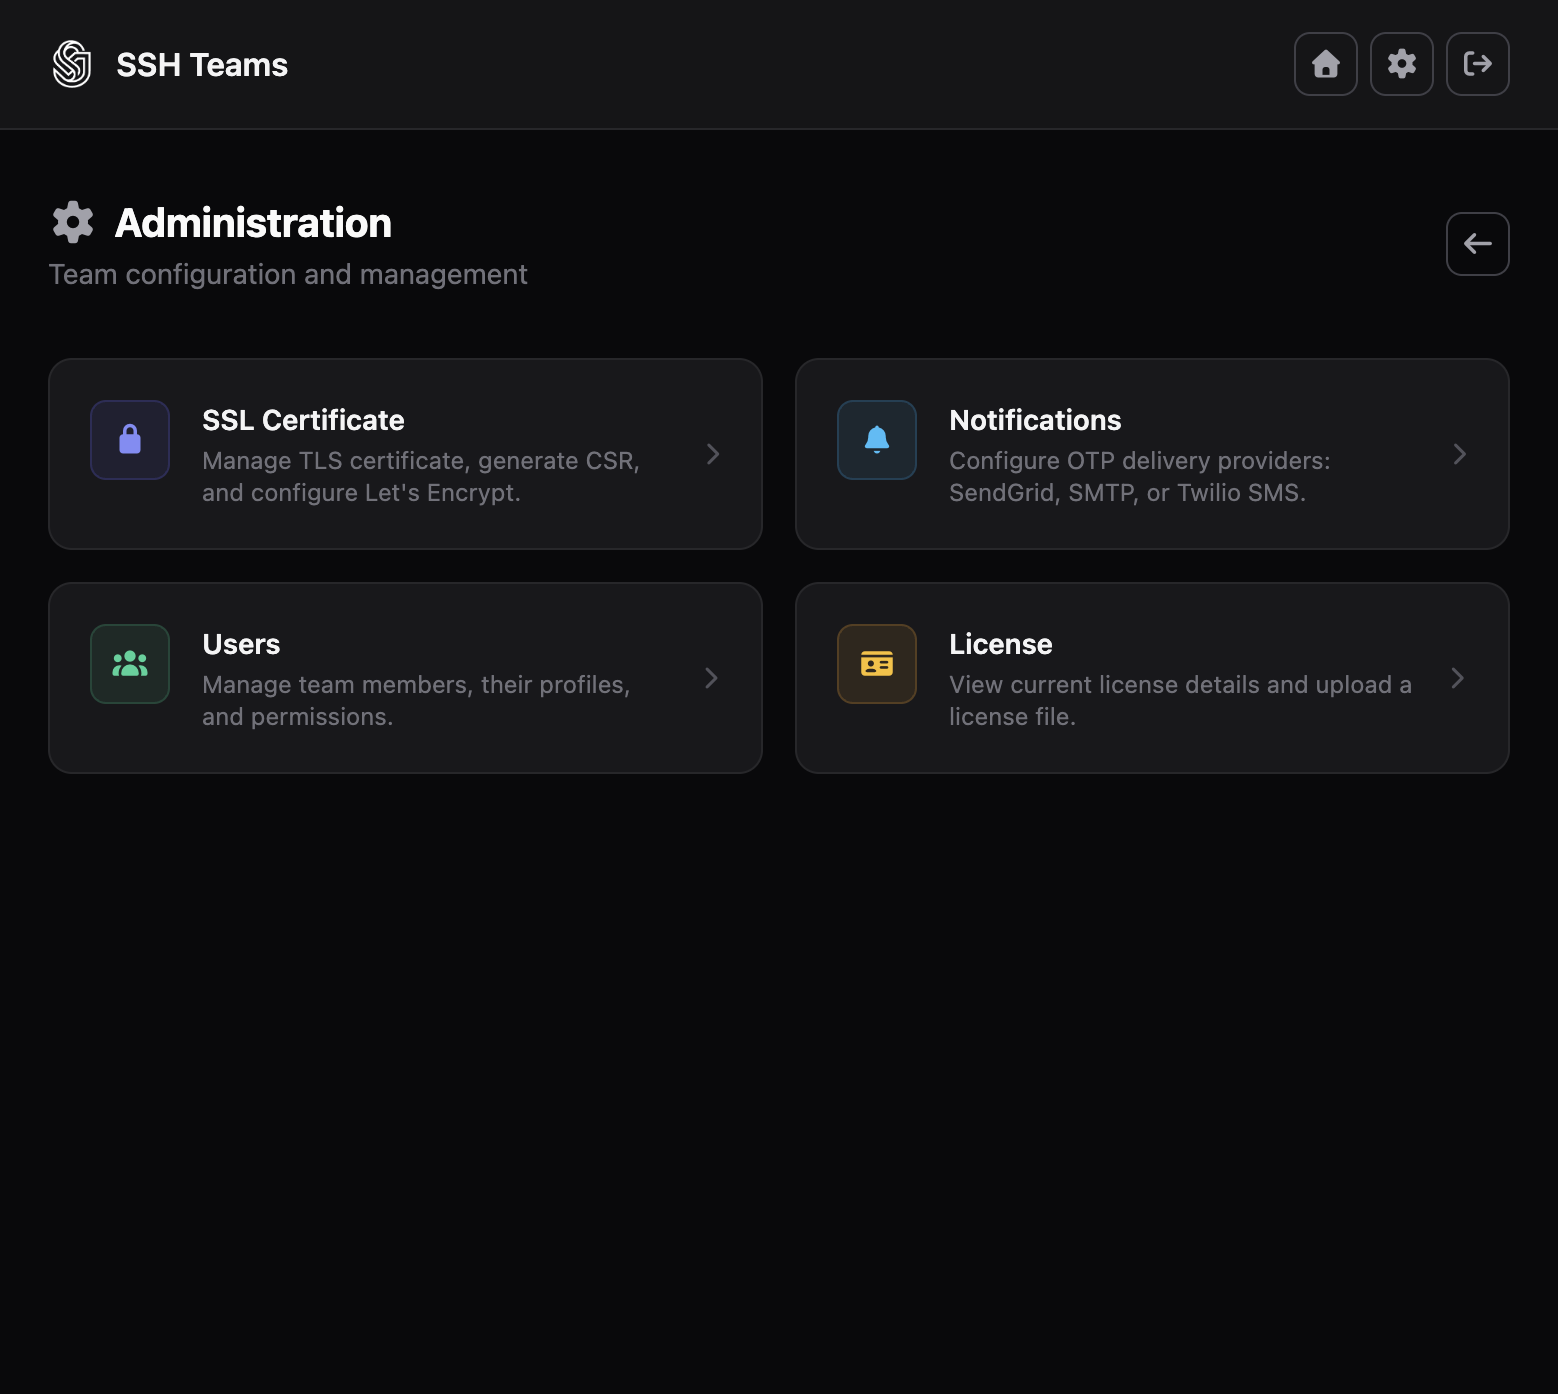
Use /administration as your main operations page.
graph TD
    A[Admin signs in] --> B[Open administration landing page]
    B --> C[Check counts access and CA fingerprints]
    C --> D{Choose operation}

    D --> E[Users and roles]
    D --> F[SSL and certificates]
    D --> G[License]
    D --> H[Notifications]

    E --> I[Run post-change validation]
    F --> I
    G --> I
    H --> I

    I --> J[Record outcome]
Before You Start
| Requirement | Lab | Staging | Production |
|---|---|---|---|
Admin account with ADMIN or required management role |
Required | Required | Required |
| Stable hostname and TLS strategy | Recommended | Required | Required |
| Backup location for config and database | Optional | Required | Required |
| Mail/SMS test destination for OTP checks | Recommended | Required | Required |
| Change log or ticket reference for admin actions | Optional | Recommended | Required |
These environment variables control where SSH Teams keeps important files:
SSHTEAM_SSL_CONF_DIRSSHTEAM_PERSISTENCE_BACKENDSSHTEAM_NITRATE_DB_FILE(Nitrate mode)MONGODB_URI(Mongo mode)
Your First Day and Your First Month
Day 1
Right after you roll out:
- Open
/administrationand check the counts and fingerprints. - Open
/administration/ssland confirm the certificate is valid. - Open
/administration/licenseand confirm the license is active. - Open
/administration/notificationsand run a provider test. - Run one end-to-end sign-in and SSH connection test.
Day 30
Set a monthly reminder to:
- Check certificate expiry and renewal.
- Check license expiry.
- Rotate notification credentials and re-test delivery.
- Run a backup and restore test.
- Record what you found and what you fixed.
If any check fails, see the Troubleshooting Handbook and Browser and Authentication Failures.
The landing page shows:
- License edition badge, for example Community Edition.
- Number of joined servers.
- Number of certificate policies.
- Number of active devices.
- Your current access based on matching policies.
- User CA fingerprints for RSA and ED25519, with a download link for
authorized_keys. - Join scripts for Linux/macOS and Windows.
- CLI download links for each platform.
When you log in, quickly check:
- Server and policy counts look normal for your team.
- Join scripts use the right hostname and port.
- CA fingerprints have not changed unexpectedly.
- You see the access entries you expect.
Admin entry points:
/administration— landing page./administration/users— users and roles./administration/notifications— OTP provider settings./administration/license— license status and upload./administration/ssl— TLS certificate management.
Managing TLS Certificates
TLS Is Critical
If TLS trust breaks, browser onboarding and CLI/API access stop working. Treat certificate changes as service-availability work.
SSH Teams keeps TLS files in the configured SSL directory:
sshteam.ssl.conf-dir(env:SSHTEAM_SSL_CONF_DIR, defaultconf.d)- Certificate:
sshteam-server.crt - Private key:
sshteam-server.key
If these files are missing at startup, SSH Teams creates a self-signed certificate automatically.
On the SSL administration page (/administration/ssl) you can:
- View the current certificate details, such as CN, validity dates, serial, and SHA-256 fingerprint.
- Regenerate a self-signed certificate.
- Generate and download a CSR for an external CA.
- Set up Let's Encrypt.
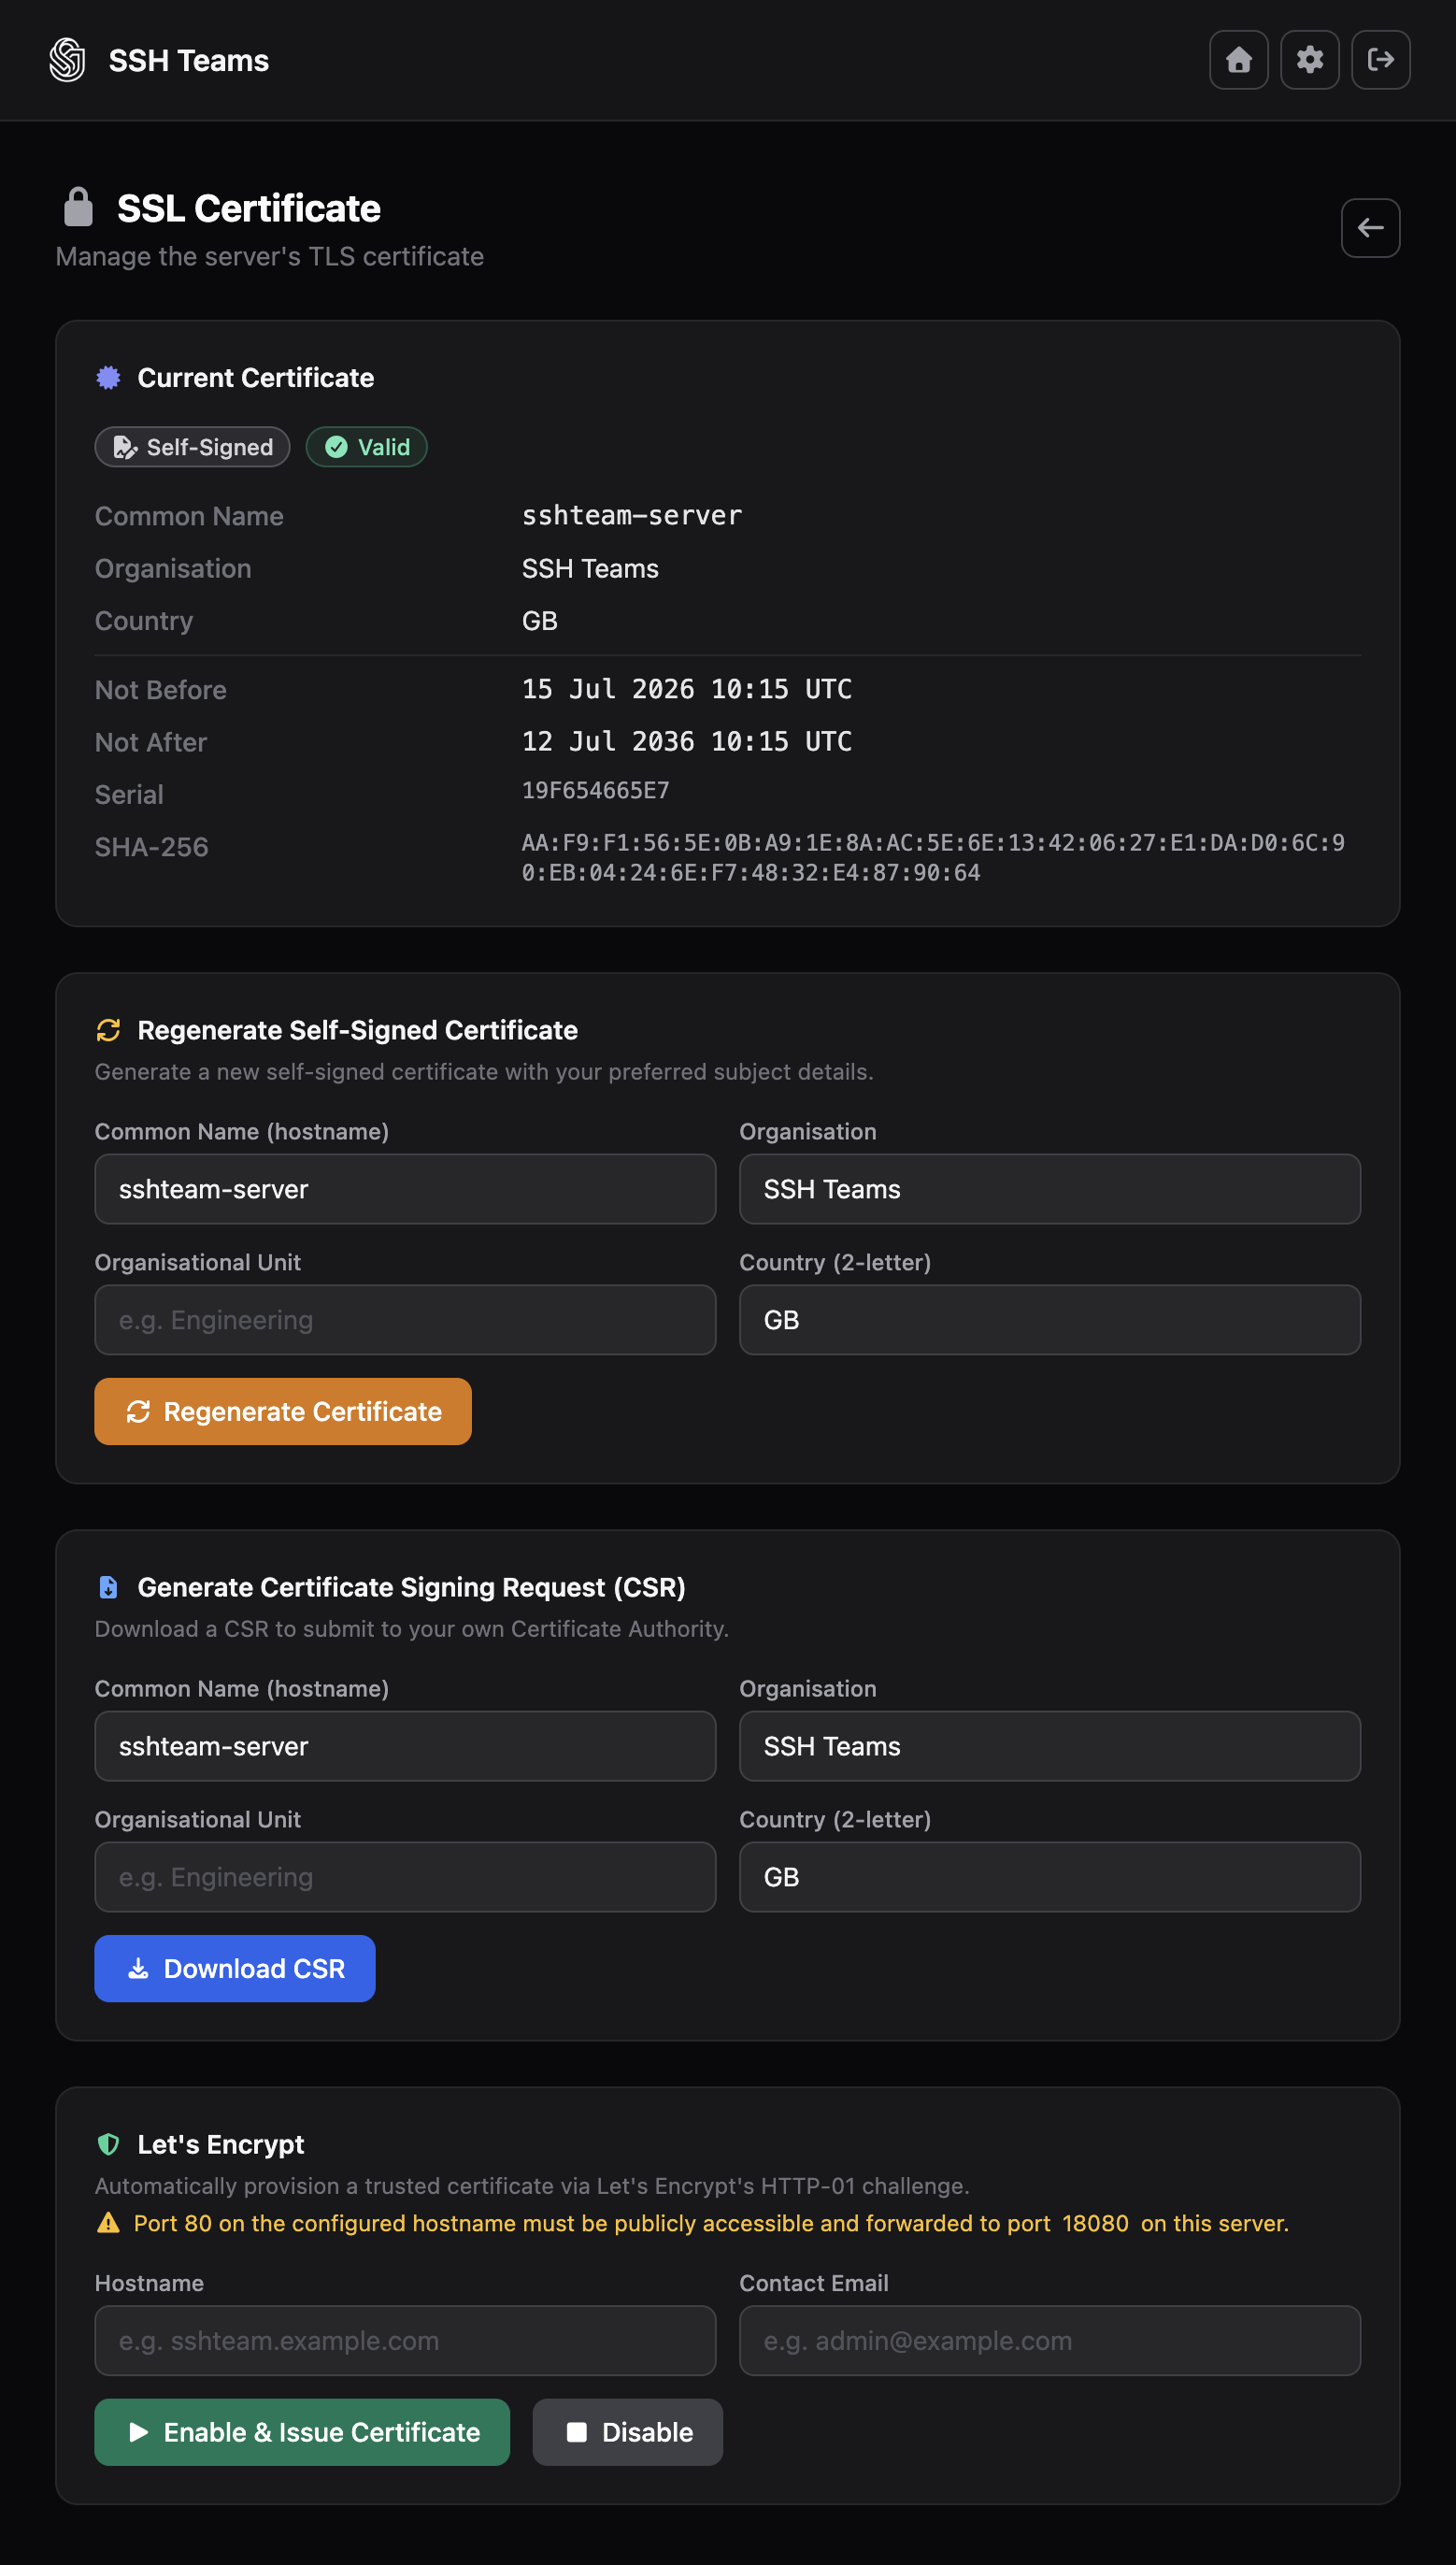
Let's Encrypt Requirements
- The hostname must resolve publicly to this service.
- The HTTP challenge path must be reachable.
- Contact email and hostname must be valid.
Recommended TLS workflow:
- Note the current fingerprint and expiry.
- Apply the regeneration, CSR, or Let's Encrypt update.
- Check the fingerprint and expiry again.
- Test browser and CLI trust from a clean client.
- Verify join scripts still show the expected URL.
Managing Licenses
License Controls Features
License state affects which features are available. Validate license changes before you finish your maintenance window.
Manage licenses at /administration/license.
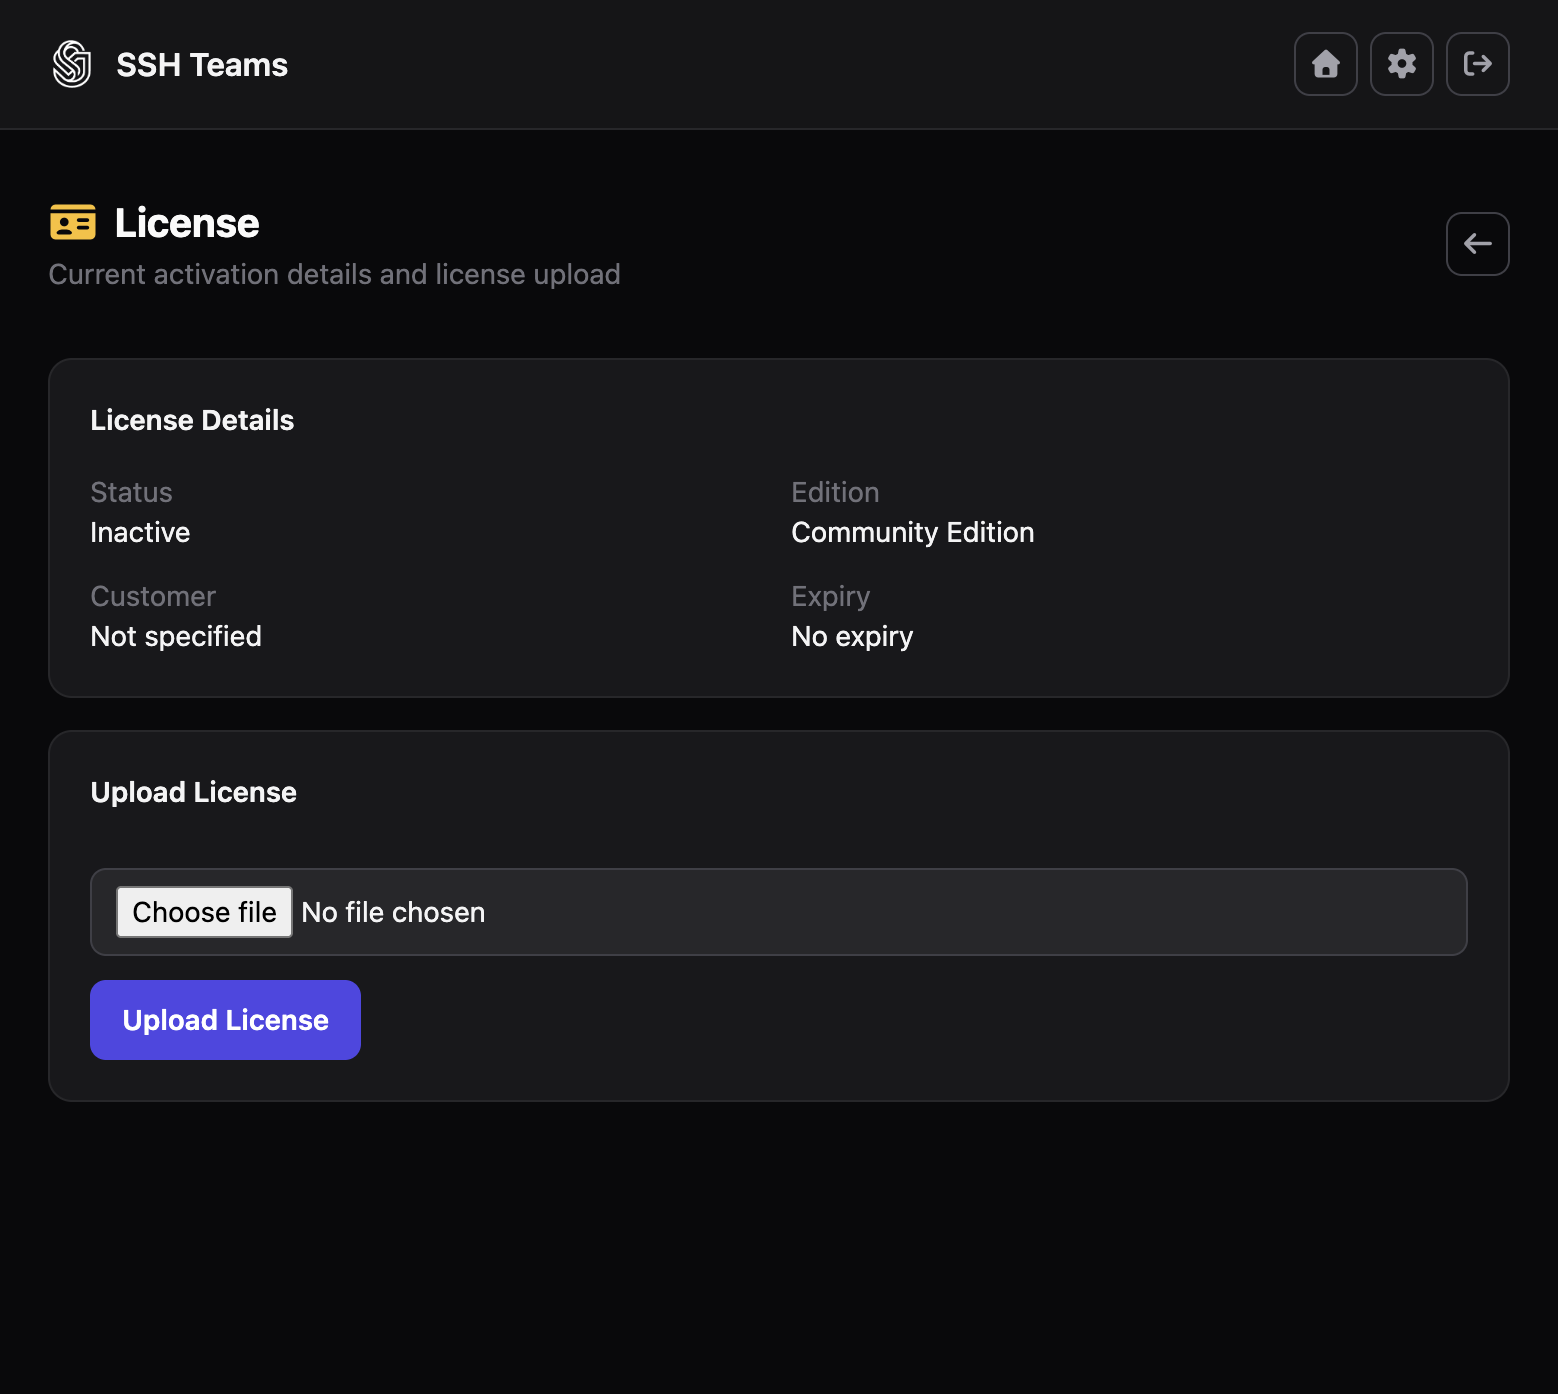
You will see:
- Active or inactive status.
- Edition.
- Customer name.
- Expiry date.
License behavior:
- Upload accepts only active licenses.
- Invalid or inactive licenses are rejected.
- The stored file is saved to
<ssl-conf-dir>/license.jwt.
Typical license workflow:
- Upload the new or renewed
.jwtfile. - Confirm status shows Active.
- Confirm edition, customer name, and expiry match your contract.
- Check
/dashboardand/administrationto confirm expected features are available.
Note
In forced-inactive testing mode the UI may look unlicensed, but a valid active license still takes precedence.
Managing Notifications
Notification Failures Block Login
If OTP delivery breaks, operators cannot log in even if everything else is healthy.
Manage notification providers at /administration/notifications.
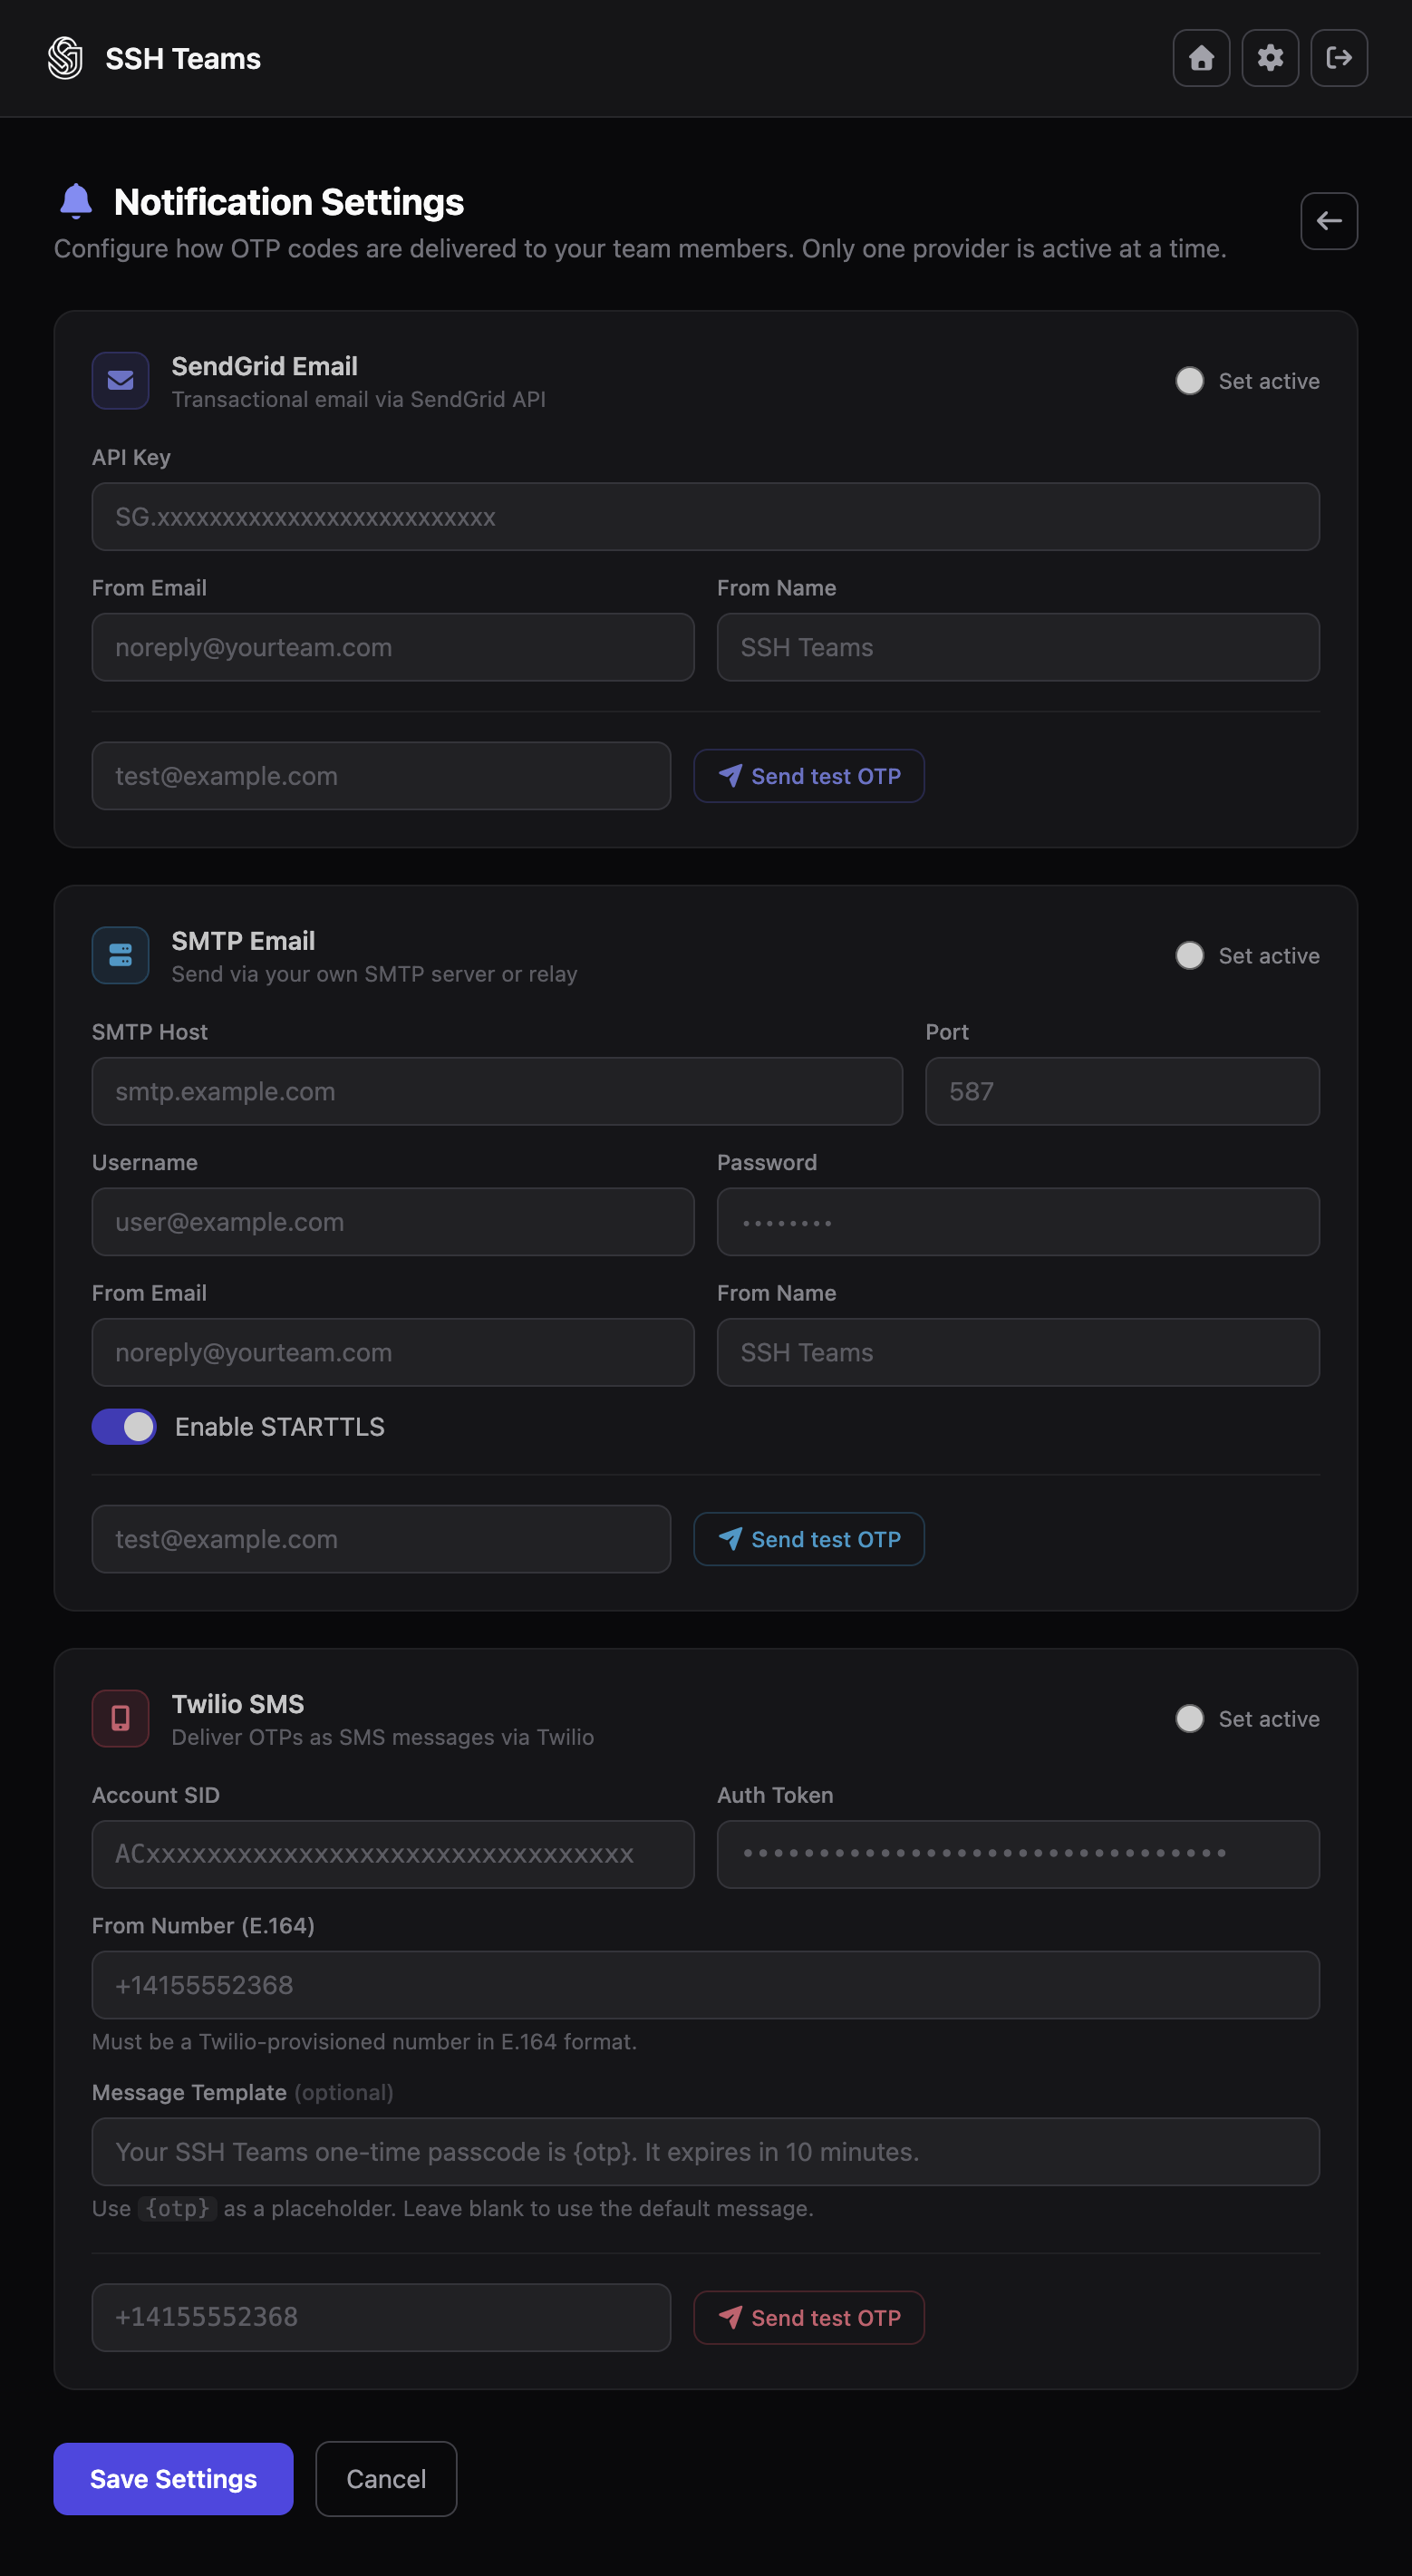
Available providers:
- SendGrid email.
- SMTP email.
- Twilio SMS.
How it works:
- You can store settings for multiple providers.
- Only one provider is active at a time.
- You can send a test message before saving.
Recommended workflow:
- Enter the provider credentials and sender details.
- Send a test OTP to a controlled address or number.
- Mark the provider active.
- Save.
- Perform a real login to confirm delivery and content.
Protect Provider Credentials
Treat API keys, SMTP passwords, and Twilio tokens as secrets. Restrict access to admins. Rotate them regularly and re-test after each rotation.
Backup and Restore
Test Your Backups
Your CA trust, license, and operational data are critical. A backup you have never restored is not a real backup.
What to back up depends on your setup.
Always Back Up
- SSL/config directory (
SSHTEAM_SSL_CONF_DIR, defaultconf.d), which contains:- TLS certificate and key.
license.jwt.- HSM keystore material if configured.
Back Up One Persistence Store
- Nitrate backend (default):
SSHTEAM_NITRATE_DB_FILE(default./nitrate/data/sshteam.nitrite.db).
- Mongo backend:
- MongoDB database from
MONGODB_URI.
- MongoDB database from
Backing Up Nitrate
- Stop SSH Teams.
- Copy the Nitrate database file and the SSL/config directory together.
- Start SSH Teams again.
Example:
# Adjust paths for your deployment
cp ./nitrate/data/sshteam.nitrite.db /backup/sshteam/sshteam.nitrite.db
tar -czf /backup/sshteam/conf.d.tgz conf.d
Backing Up Mongo
- Back up the MongoDB database with standard Mongo tools.
- Back up the SSH Teams SSL/config directory in the same window.
Docker note:
- The default compose setup mounts
./conf.d:/app/conf.dand persists Mongo data in themongo-datavolume.
Restoring
- Stop SSH Teams.
- Restore the SSL/config directory.
- Restore the persistence data.
- Start SSH Teams.
- Validate:
- Login works.
- Dashboard counts look right.
- Device issuance and signing work.
- License and notification settings are present.
Recovery Checklist
- Admin login succeeds.
- A user can complete the OTP flow.
sshteam signworks for an allowed target.- CA fingerprints match what you expected.
- License edition and expiry match your records.
Tips and Common Gotchas
Treat Every Change as a Mini Change Set
Make the change, run one validation command, and record the result in your ticket.
Check Join Scripts After TLS Changes
After rotating certificates or updating a proxy, confirm the advertised hostname and port still match your public endpoint.